Macro Photography 101 with Kate Jonker - Part 2
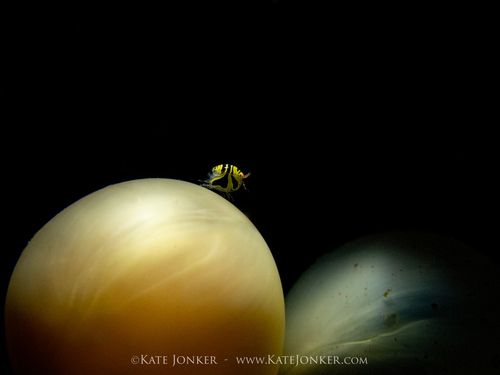
Amphipod on cuttlefish eggs, photographed using a TG5 in microscope mode and narrow beam torch.
Lighting, Composition, and useful equipment for macro underwater photographers
In last week’s post Macro Underwater Photography Part 1, we covered the different camera types, lenses, and basic settings for macro underwater photography. This week we cover lighting options, composition, and equipment you can use to help you get the best out of your underwater macro photography.
Strobes
Adding a strobe to your setup will take your photography to the next level! When I first started taking photos underwater, I did not use a strobe. I did not even use the camera’s flash. This helped me learn how to get the most out of ambient (natural) light and how the settings worked in manual. However, when I finally took the plunge and added a strobe, I realized what a huge difference this made. The colours just popped!
For macro photography, you can get by with just one strobe. Strobes can be costly; but look at this way – buy the best you can afford, and it will see you through a lot of dives, a lot of cameras and a lot of upgrades. I use strobes that I bought in 2015 and they are still going strong!
One important thing to remember when using a strobe, is to set the white balance of your camera to Auto White Balance (AWB). This will give you the best colour reproduction.
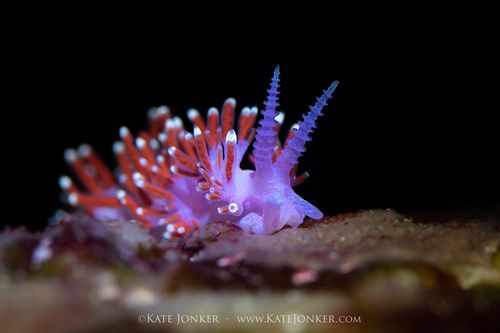
Purple lady nudibranch photographed with just a narrow beam torch.
Strobe Positioning
Depending on how you position your strobe, you can create shadows, light just your subject and increase texture and vibrancy. The beam that comes out of a strobe is like a cone - narrow as it comes out of the strobe becoming wider and less bright the further away it travels.
Single Strobe - Standard Strobe Positioning
The best way to position a single strobe is to centre it above your housing, pointing slightly upwards at a 45-degree angle. For best lighting (and to prevent backscatter), you want to light your subject with the edge of the cone so that the water between your camera and your subject is not illuminated.
Two Strobes – Standard Strobe Positioning
The best way to position two strobes for even lighting is to place them on either side of your port or housing, pointing straight forward. This will give you an even spread of light. To create a more dramatic effect, you can set your strobes at different strengths or point them in different directions. It is a lot of fun to play around with this!
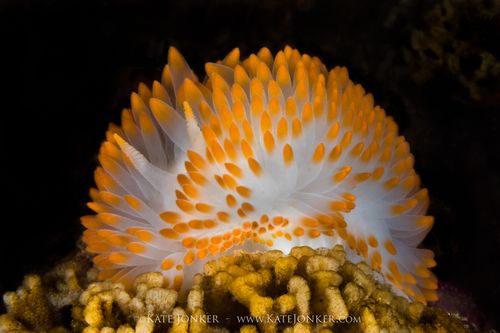
Orange gasflame nudibranch, photographed with one strobe; turned slightly towards the camera to only light the nudibranch and not the background.
No strobes? Use Constant Lighting!
If you do not have a strobe, it is possible to use a torch or video light instead. However, as torches and video lights tend to be less powerful than strobes, their light is much softer, and you will not have the hard-edged image sharpness that strobes give you.
You will also need to slow down your shutter speed and push up your ISO to allow more of this light to hit your sensor. Try to keep your shutter speed to 1/125 at the slowest or you will get blurry images. You will have to do a lot of playing around with the settings to get the right exposure as there is no “one size fits all”. If you do decide to use a torch or video light, my advice is to get the brightest, narrowest, strongest light possible and point it directly at your subject.
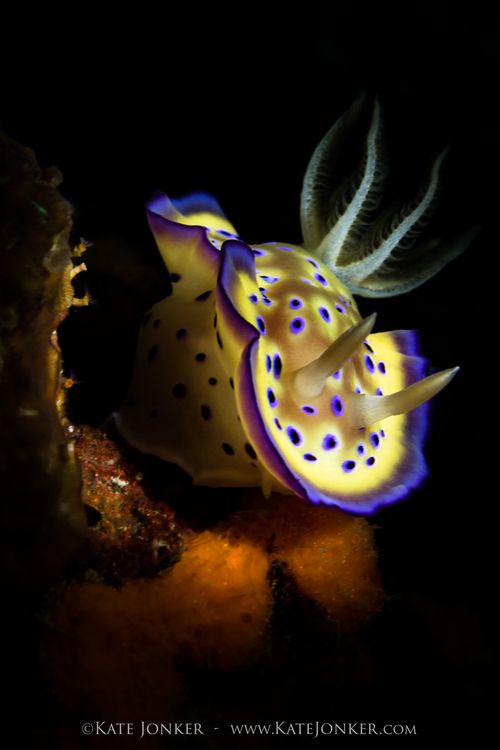
A Goniobranchus kuniei nudibranch photographed using just the narrow beam of a torch to light it.
Composition
Keep it simple! For the best impact, you want to separate your subject from the background. This can be done by clever strobe positioning, using a snoot or by using a shallow depth of field (wider aperture) to blur out the background. Fill your frame with the subject – get close and get closer! Get down to their level and focus on the eyes (or rhinophores)! Good eye contact is vital as it draws the viewer into your image.
Additional Equipment
Diopters
Diopters are basically underwater magnifying glasses which you can attach to the front of your underwater housing. They are also known as wet lenses as you can attach and remove them underwater. They help to enlarge the tiniest critters such as amphipods and small nudibranchs. Compact cameras and 60mm lenses can benefit from the use of these. There are many different types on the market and lots of different strengths. Strengths can range from +5 to +12 to +24 with the higher number being the higher the magnification. If you purchase just one, a diopter of around +12 or +15 is the best option to go for.
The more magnification you are using, the less depth of field you will have. To ensure that more of your subject is in focus, you need to use a higher f-stop.
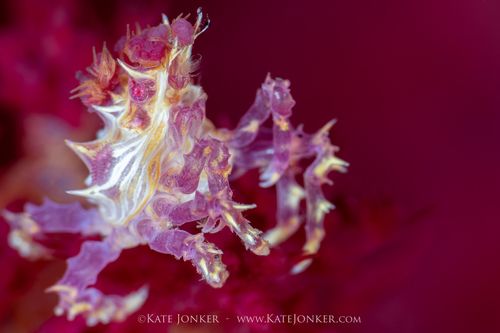
Very tiny candy crab, photographed magnified using a +15 diopter. Although the aperture was set to F22, the high magnification left the background completely blurred out.
Focus lights
Most cameras focus by seeing contrast and to see contrast, there needs to be enough light on your subject. So, lighting your subject with a focus light helps your camera focus. If your strobe has a focus light, you might wonder why you cannot just point that at the subject; but in practice, you are not going to be pointing your strobe directly at your subject (see strobe positioning above), so that is not really an option.
Safety
It is amazingly easy to get drawn into the tiny world of macro subjects, and to hunt for the tinier critters, you will need to swim slower than most divers. If your buddy is not taking photos and swimming faster than you, it is quite easy to lose each other – especially when visibility is low. The safest way to dive is to team up with a fellow macro photographer who dives at the same pace as you do.
As we tend to concentrate a lot more, it is quite easy to lose track of time. I check my air and bottom time as I approach my subject so that I know how much of each I have left. I then check these again after taking the shots. It has become second nature but the safest way to dive! Time passes quickly underwater!
Macro photography is a lot of fun and once you discover the best settings for the results you want, you will start seeing amazing results. And just a word of warning – once the macro bug bites, it gets rather addictive!
About the Author & Photographer:
Kate Jonker a writer and underwater photographer based in Gordon’s Bay, just outside Cape Town. She is a regular contributor to numerous underwater photography and diving magazines and her images have been featured in both local and international publications. A regular judge in international underwater photography competitions, she teaches underwater photography and is a qualified dive boat skipper and dive guide for Indigo Scuba Diving Centre (www.indigoscuba.com) which she and her husband own and run in Gordon’s Bay. Kate’s passion lies with sharing her love of the ocean and her underwater experiences with others through photography and storytelling.
“Photography is a fantastic medium with which to create an awareness of the beauty - and plight - of our oceans. Images can stir many emotions and we, as underwater photographers, have the opportunity to tell visual stories about our underwater world to encourage its protection and preservation.”
Connect with Kate Jonker:
Website: www.katejonker.com
Instagram: https://www.instagram.com/katejonkerphotography/
Facebook: https://www.facebook.com/KateJonkerPhotography
YouTube: https://www.youtube.com/channel/UCUOVIfi0qDGMRfiRUzeZ_TQ
Indigo Scuba:
Website: www.indigoscuba.com
Instagram: https://www.instagram.com/indigoscuba/
Facebook: https://www.facebook.com/indigoscuba
YouTube: https://www.youtube.com/channel/UC0mGtOa7vPAB7IrxySSKSTA
Categories
2025
2024
February
March
April
May
October
My name is Rosanne… DAN was there for me?My name is Pam… DAN was there for me?My name is Nadia… DAN was there for me?My name is Morgan… DAN was there for me?My name is Mark… DAN was there for me?My name is Julika… DAN was there for me?My name is James Lewis… DAN was there for me?My name is Jack… DAN was there for me?My name is Mrs. Du Toit… DAN was there for me?My name is Sean… DAN was there for me?My name is Clayton… DAN was there for me?My name is Claire… DAN was there for me?My name is Lauren… DAN was there for me?My name is Amos… DAN was there for me?My name is Kelly… DAN was there for me?Get to Know DAN Instructor: Mauro JijeGet to know DAN Instructor: Sinda da GraçaGet to know DAN Instructor: JP BarnardGet to know DAN instructor: Gregory DriesselGet to know DAN instructor Trainer: Christo van JaarsveldGet to Know DAN Instructor: Beto Vambiane
November
Get to know DAN Instructor: Dylan BowlesGet to know DAN instructor: Ryan CapazorioGet to know DAN Instructor: Tyrone LubbeGet to know DAN Instructor: Caitlyn MonahanScience Saves SharksSafety AngelsDiving Anilao with Adam SokolskiUnderstanding Dive Equipment RegulationsDiving With A PFOUnderwater NavigationFinding My PassionDiving Deep with DSLRDebunking Freediving MythsImmersion Pulmonary OedemaSwimmer's EarMEMBER PROFILE: RAY DALIOAdventure Auntie: Yvette OosthuizenClean Our OceansWhat to Look for in a Dive Boat
2023
January
March
Terrific Freedive ModeKaboom!....The Big Oxygen Safety IssueScuba Nudi ClothingThe Benefits of Being BaldDive into Freedive InstructionCape Marine Research and Diver DevelopmentThe Inhaca Ocean Alliance.“LIGHTS, Film, Action!”Demo DiversSpecial Forces DiverWhat Dive Computers Don\'t Know | PART 2Toughing It Out Is Dangerous
April
